


Lab System Pro
Starting up the system


Starting a Case
New Case


Start Recoding

-
or double click live screen
Amplifier configurations
Selecting config

Checking/changing pin config


Please note: anytime config box is open – recording is paused
Procedures
Selecting procedure (either option)
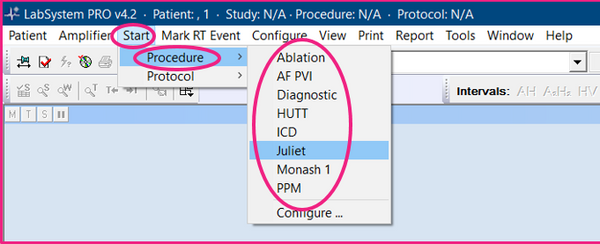

Using procedures & protocols
-
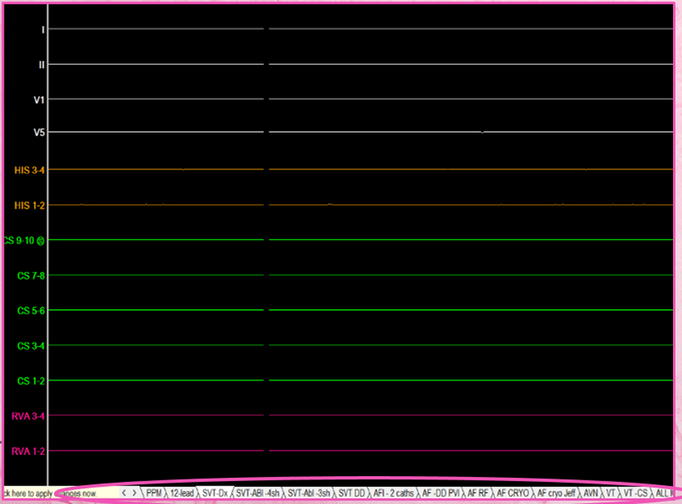
Selecting a procedure will bring up a toolbar of protocols and start a Folder in the log
-
Selecting a protocol will bring up a toolbar of mark RT events and start a folder in the log within the procedure folder. These event labels will also be above the log to easily label events.
-
I choose to place my mark RT event toolbar along the right side of the review screen to create more space vertically.
-
Using the mark RT event toolbar will mark and grab the current image on live screen
-
F7 will up date the review
-
Control F8 will mark the current image on the review screen as Unspecified.
-
The label can easily be changed by selecting one of the labels above the log (correlate with the mark RT events)


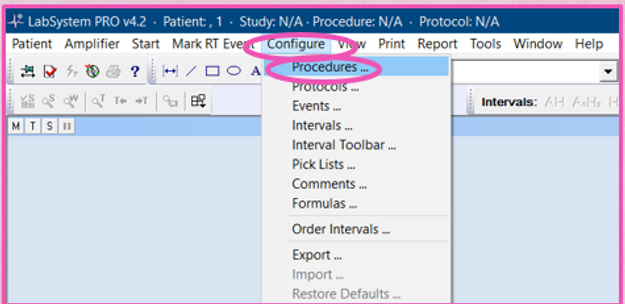
Customising procedures & protocols


Display set up
-
I adjust the stim update marked depending on what case I do.
-
For SVT diagnostic studies I usually leave it around 2/3rd into the screen (as displayed in picture).
-
For procedures where I am constantly updating and measuring beats (e.g., PVCs, ATc, WPW, AVRTs) I place the cursor at the far right hand side of the screen so I don't have to scroll back each time.
-
During a waiting period after ablation, I will place the cursor all the way to the left hand side of the screen and change the sweep speed to minimum to mimic a real time holter.

Logging medications

Morphology templates


Setting up live screen
logging paced events
-
ensure tick is green to log stimmed events

Status window and channel adjustments

Select page down the bottom of sceen
Adjusting pages within a protocol

Changing displayed ECGs/EGMs
-
Tick/untick channel to display/hide
-
Scale or colour may also be changed by selecting the arrow and selecting a different option

Key board controls


Displaying ablation information
Displaying RF data on live screen


Selecting the generator


Adjusting the generator display


Other useful customisations


Ending a case
Stop recording

Exiting a case

Archiving cases

-
Highlight patients in list
-
Choose correct folder from browse
-
Select Full archive
-
Hit close when complete
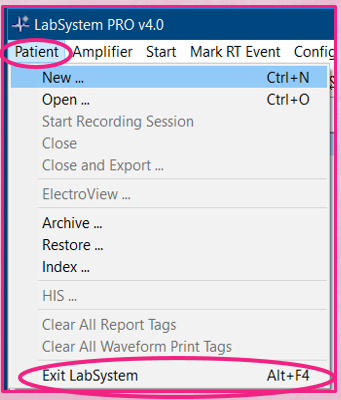
Shutting down the system

-
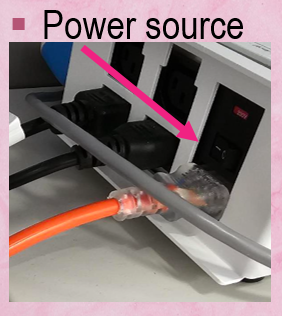
Switch off AMP & power source!